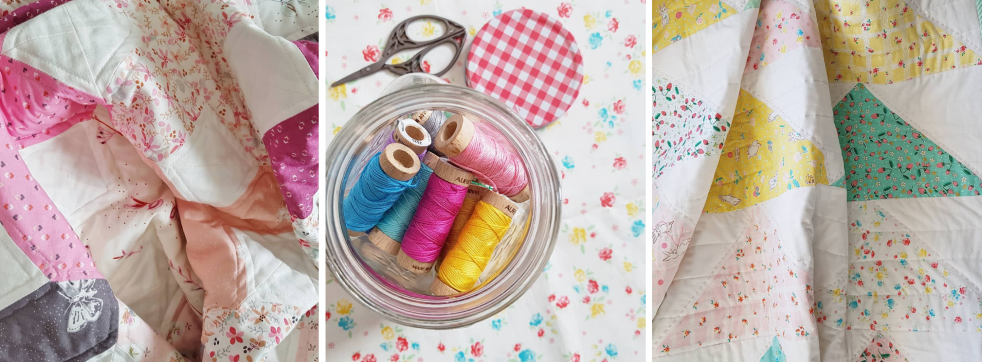
I was recently sent some embroidery hoops from Groves Ltd by Milward and as soon as I saw the mini pink one I just knew it would be perfect to show off some of my new Heather Ross Trixie fabric. I mean how could I not, it is very cute!

I thought it would be fun to share the process with you so you can make your own cute pieces of art. Who says embroidery needs to go in a hoop? You could always add a little embroidery embellishment if you wish.
You will need:
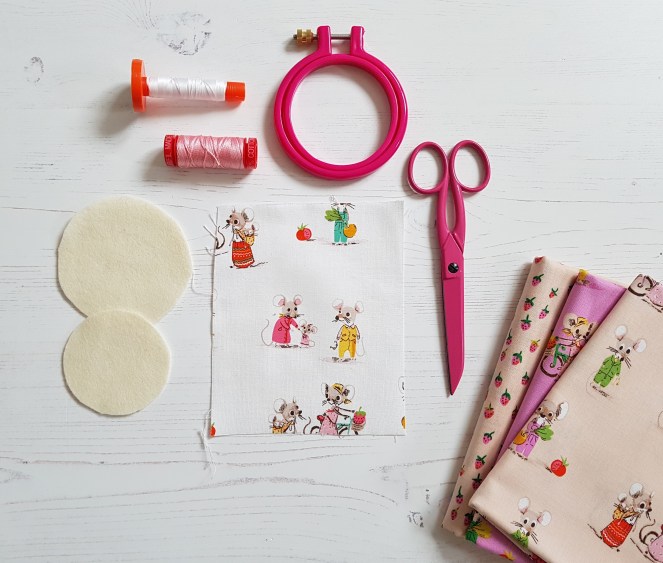
- 3″ Embroidery hoop
- 2 pieces of felt
- 5″x6″ Fabric (minimum)
- Scissors
- Hand sewing needle
- Thread (I used Aurifil 12 wt for the embroidery and 50 wt for sewing the back)
- Marking pen like a Frixion
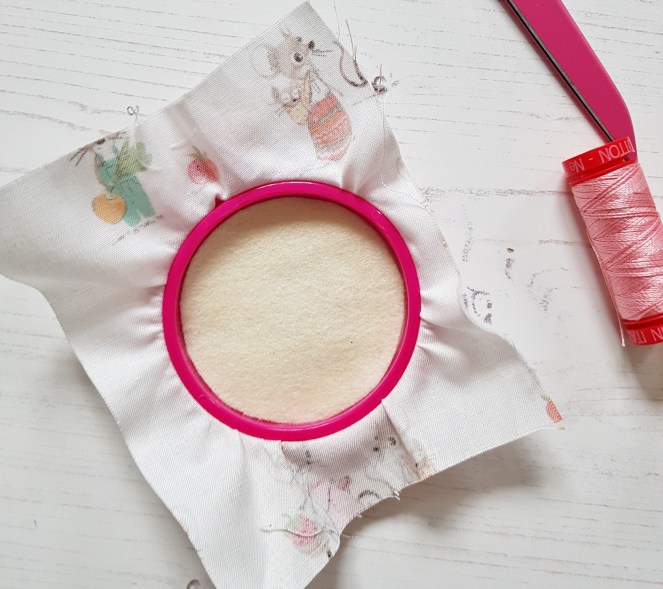
1.Get your hoop and centre it over your chosen fabric. Play around with the hoop until you are happy with your fabric placement.
2. Before you put the back of your hoop together, take one of the pieces of felt and draw around the inside of the circle. This will be going inside the hoop behind your fabric. Cut the circle out. Take the other piece of felt and draw around the outside of the circle. The circle should measure approximately 2.75″ across. Cut out and set aside.

3. Attach the back of the hoop to secure the fabric. Place the felt circle you made in the last step in the back. It should fit nicely, if it’s a bit tight trim it down to size
4. Now for the fun part, time to get creative! This step is totally up to you, you can add as little or as much embroidery as you like, and if you’re not into embroidery that is fine too! Just skip to the next step.
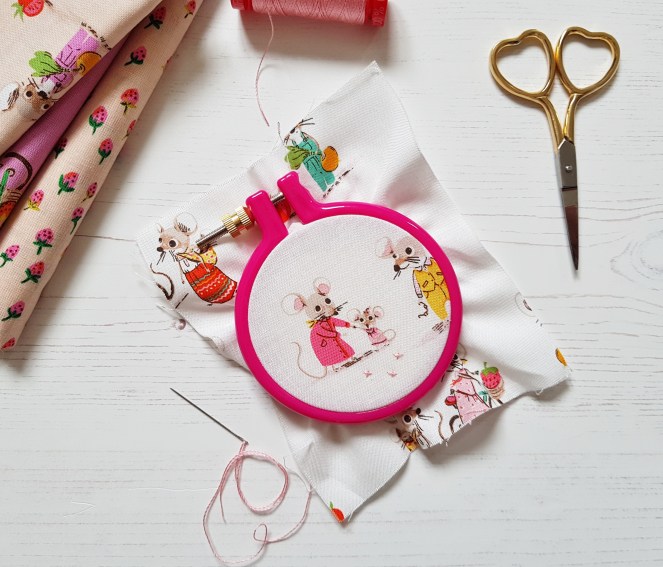
For the embroidery I used Aurifil 12wt (colour #2425) thread. It was the first time I used it for this purpose having only used for a little hand quilting before and I loved it. Oh so smooth to sew with and it gives it such a lovely textured effect! This is where placing the felt circle in the back makes sense. It’s a little protection and stability for the fabric from the stitches and cleverly hides any stitching work on the back showing through the front. Which may not be such a problem on a thick or darker fabric, but with this white I didn’t want to chance it!
As for my thoughts on the hoop, I have used them for a couple of projects now and I love how the fabric stays put while you sew, it doesn’t budge so there was no need to keep adjusting the fabric to make it taut again. The hoop although plastic was also very light to hold.
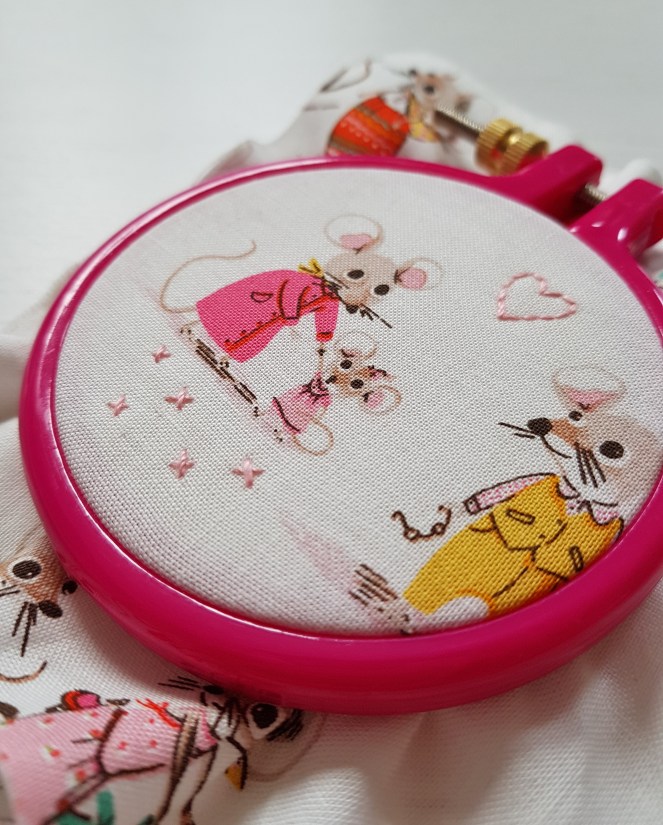
I couldn’t resist adding some sweet little cross stitches and some little hearts. Although right till the very end I couldn’t decide on how many! (you may notice, some final pictures have 3 and some have 2!)
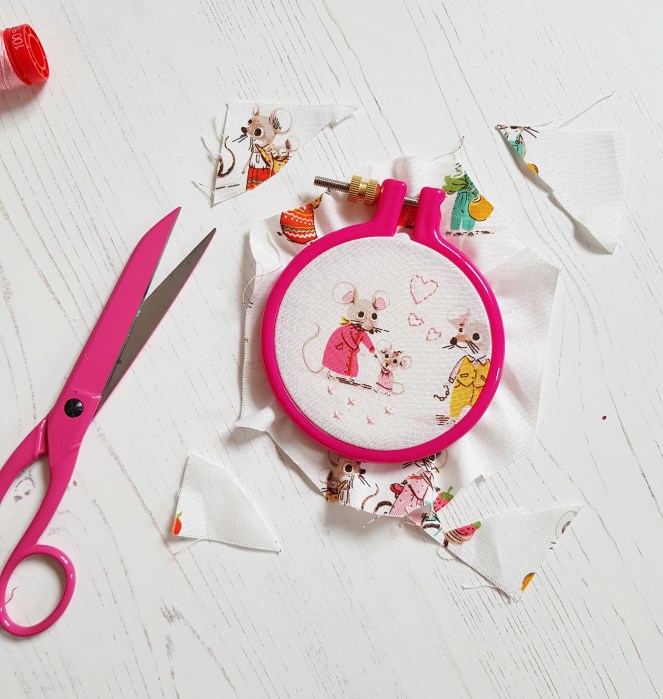
5. Once you are happy with your finished design it’s time to turn it from a piece of stitching to a framed piece of art. To do this we need to start by trimming the fabric down. Grab your scissors and snip out the corners.
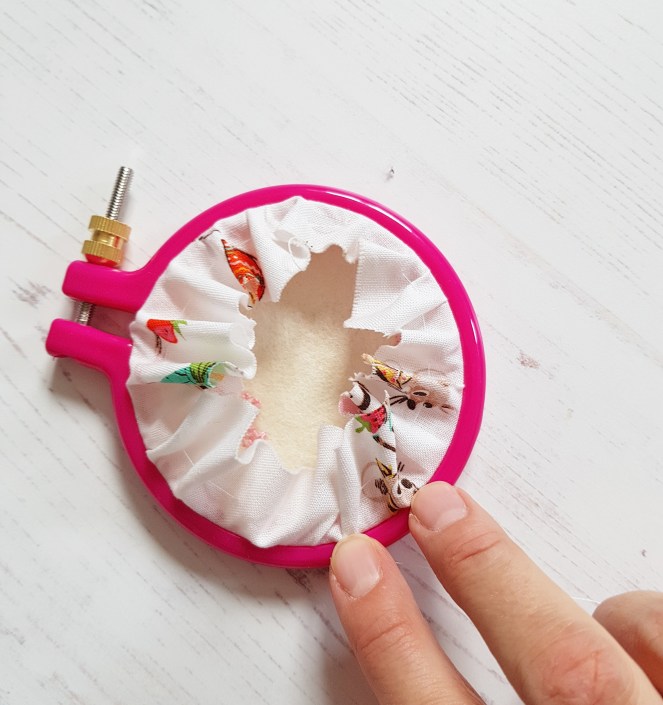
6. We now need to get the remaining fabric all tucked in at the back. So with your needle and thread stitch a running stitch about a 1/4 inch away from the edge of the hoop.

Your stitches won’t be seen so don’t worry about them looking perfect. Don’t forget to secure the end of the thread by tying a knot in the end. Keep the stitches quite long and slack so the next step will be easier!
7. Once you have got back to your first stitch pull the thread gently and the fabric will gather and fold in on itself.
8. Now it is time to hide it all away. Taking the second felt circle you made in step 2 place it over the back of the hoop making sure to keep it centered. Taking your needle and thread slip stitch around the entire edge of the hoop.

I have included a short video to give you an idea how to do it. As this will be on the back it doesn’t matter if it is not stitch perfect, no one will see it!!
You may find you need to trim it down a little, if that’s the case just trim to size with a sharp pair of embroidery scissors, being careful to not trim too much!

This is the back of mine, not quite perfect but it has hidden everything!
All that is left to do know is put your little work of art up for display!
I hope you enjoyed this little tutorial, if you have any questions please feel free to ask!
(Please email Groves@stockistenquiries.co.uk for stockists of the Milward Embroidery hoops.)
