I have to be honest I am super lazy when it comes to making my own binding! My first choice is to buy pre-made, always, even for quilts! Perhaps not the most cost effective and certainly very limiting with regards to fabric choices, but by the time it comes to the binding stage of a project I’m far too excited that the end is in sight to be thinking about measurements and 45° degree angles to consider making my own. Not just that there’s the whole joining strips together (something I can never do cleanly!) and pressing the folds.
So when Clover asked me if I would like to try their new Bias Binding Ruler, I jumped at the chance. ANYTHING to make making binding quicker and easier!
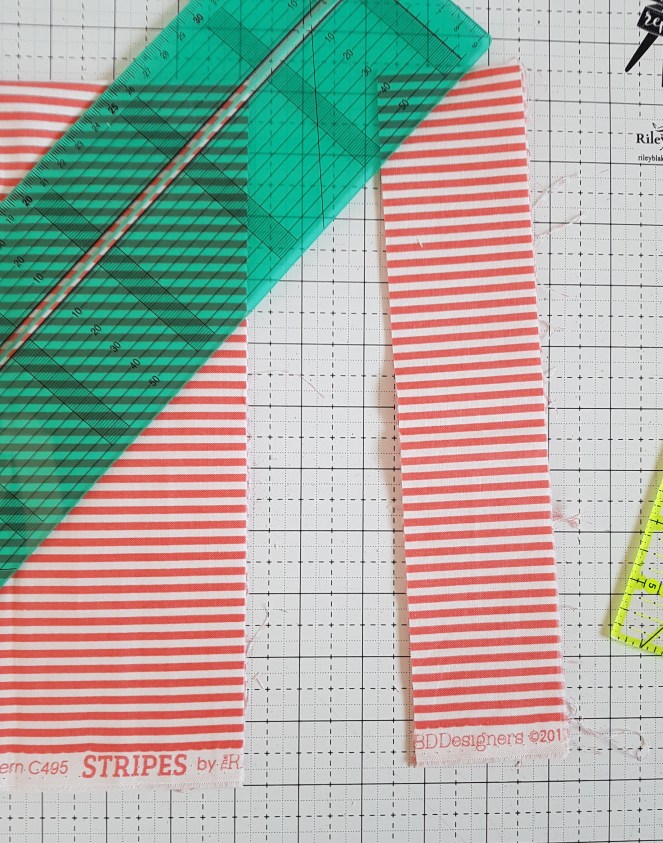
I really like this ruler, one thing I find that tends to happen when cutting strips with a normal quilting ruler is it has a habit of moving slightly. Leaving me with strips that are a little wonky! But you see that slit in the ruler? That has been designed wide enough to fit your rotary cutter.
So let me show you how I made some spotty polka dot bias binding! I really should get a video of me doing this but for now here it is in pictures.

To cut fabric on the bias simply line up the line that is going through the ruler parallel to a line on your cutting mat. You will need to make sure your fabric is level with the lines on the mat too for better cutting accuracy.
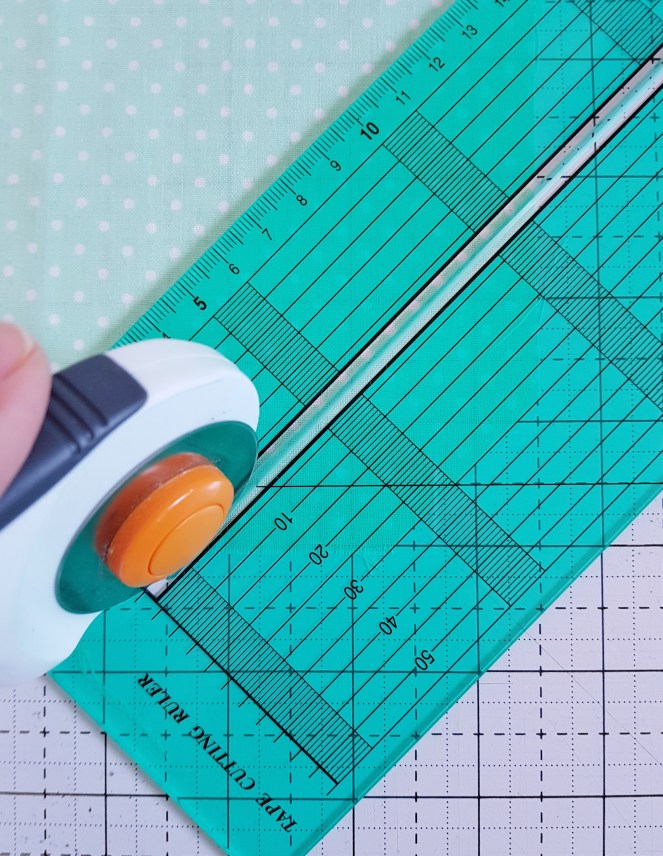
Line the corner up with the line of your desired width. In this picture I chose 30 mm for demonstration. Set the blade of the rotary cutter in the wider end of the slit of the ruler and cut. There is a wider slit at both ends of the ruler so it suits both left and right handed users (I am a leftie!)

There you have it your first strip! Keep going in the same way until you have your desired amount. I decided after the first picture I preferred a wider strip so continued with 50 mm wide, which equals roughly 2.5″ my favoured width for binding.
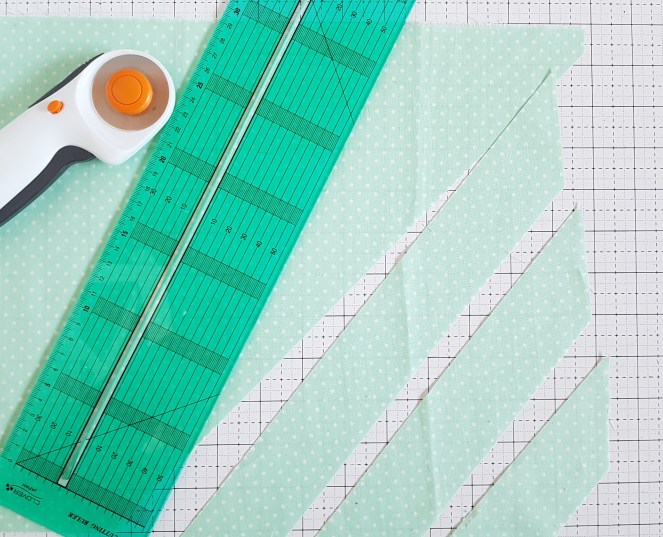
Despite appearances in this picture I did iron my fabric before cutting!!
For cutting straight strips for example for a quilt binding it is the same principle but this time rather than matching the bias line on the ruler with the cutting lines you match the edge of the ruler, like you would a normal cutting ruler. The benefit of this as I mentioned earlier is it does make it a lot easier to keep the ruler from wobbling about.

Who can resist a stripey binding!?
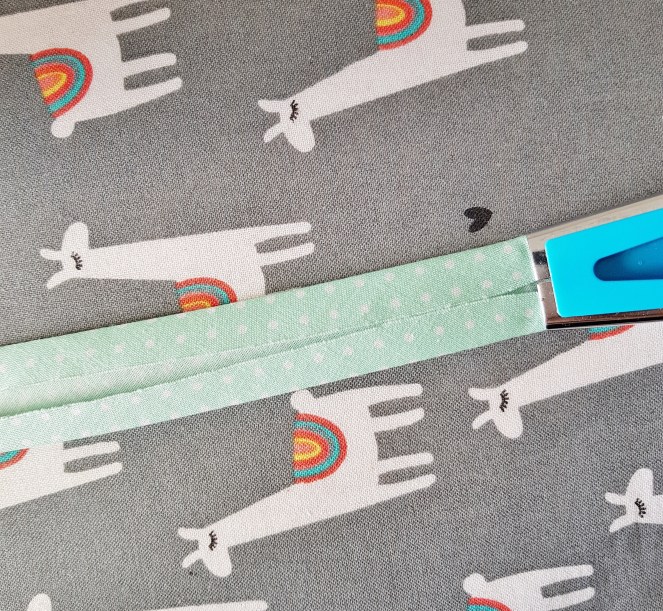
Now normally when making double fold binding I risk burning fingers and have to use a lot of patience to press each fold. I have had a tape maker in my supplies for some time and you know I never got on with it! I couldn’t get why people raved about it and said how easy it was to use. I couldn’t even get the fabric to go through it!
A little tip, once you get a little corner through, grab a pin or a pair of sharp embroidery scissors and use that to guide and wiggle it out the other end.
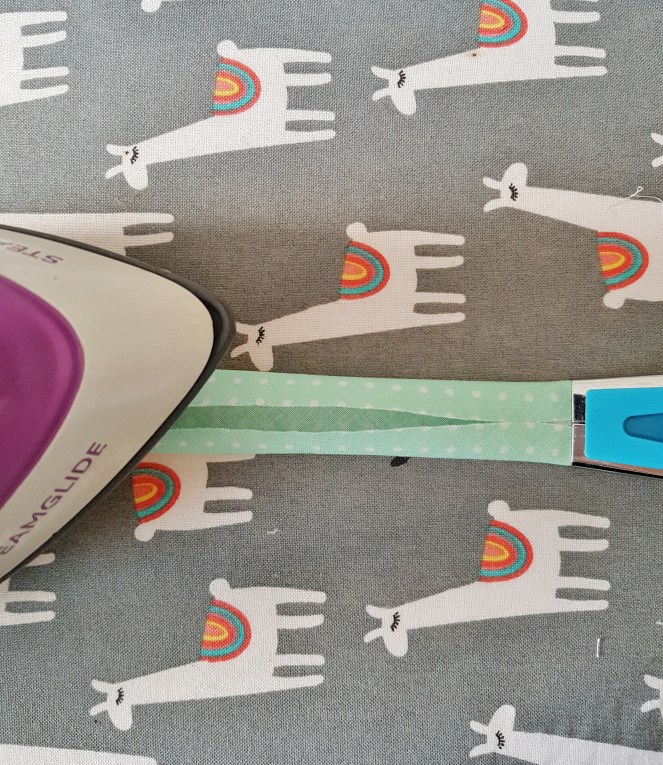
Another issue I had was being unable to get the seamless pressing of it that you see in demonstrations. Both folds of mine were totally unequal and pressed badly. It was in my opinion much easier (although a longer process to do it without!) Being left handed can sometime be a disadvantage when watching tutorials, and it suddenly occurred to me that maybe the reason it kept going wrong was using the wrong hands. I had the iron in my left hand and was trying to pull the tape through with my right. When I switched hands and put the iron in my right hand (my non-dominant hand) and the tape in my left, it was like magic it suddenly all fell into place and I had that satisfying motion of double fold being made in one glide of the iron!
Now it could be a total coincidence or chance, maybe it doesn’t make a difference which hand is which. Maybe it was just down to the fact of a little practice, but whatever it is this is the way that suits me and I will continue doing it like this. So to all my fellow lefties out there who have struggled maybe have a go, or message me and tell me I’m talking nonsense! :D

I’m off now to find something to use my new spotty binding on! I hope you found this helpful. If anything is unclear please feel free to get in touch and I’ll be happy to help!
The Ruler was sent to me by Clover MFG in exchange for an honest review, I have not been paid for this article and all thoughts are my own. For stockists and more information click here, this is a non affiliated link and I will not receive anything if you do :) Or if you prefer you can email them – clover@stockistenquiries.co.uk
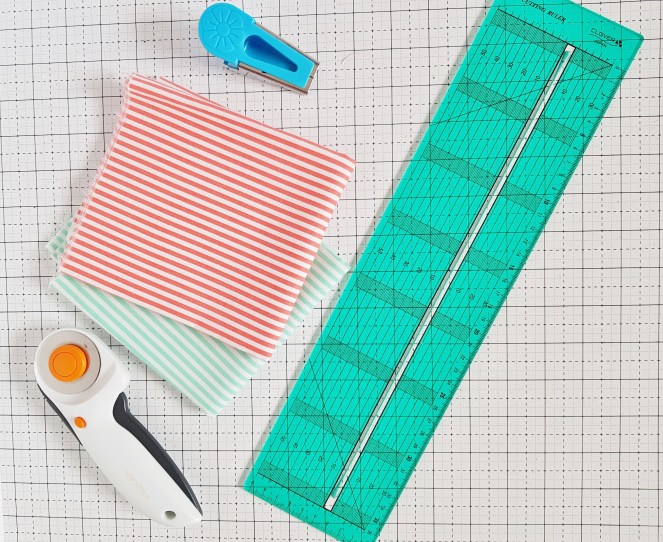
Fabrics used are from Riley Blake Designs basics collections Swiss Dots and Stripes.
